Stacy from Visual Venturing is hosting One Photo Focus, a photo editing challenge. Editing is something that I don’t have much experience with, so I thought this would be a good way for me to learn. Please click through the link above, it’s an amazing group of talented people. Thank you to Stacy for organising this, I know it was a lot of work!

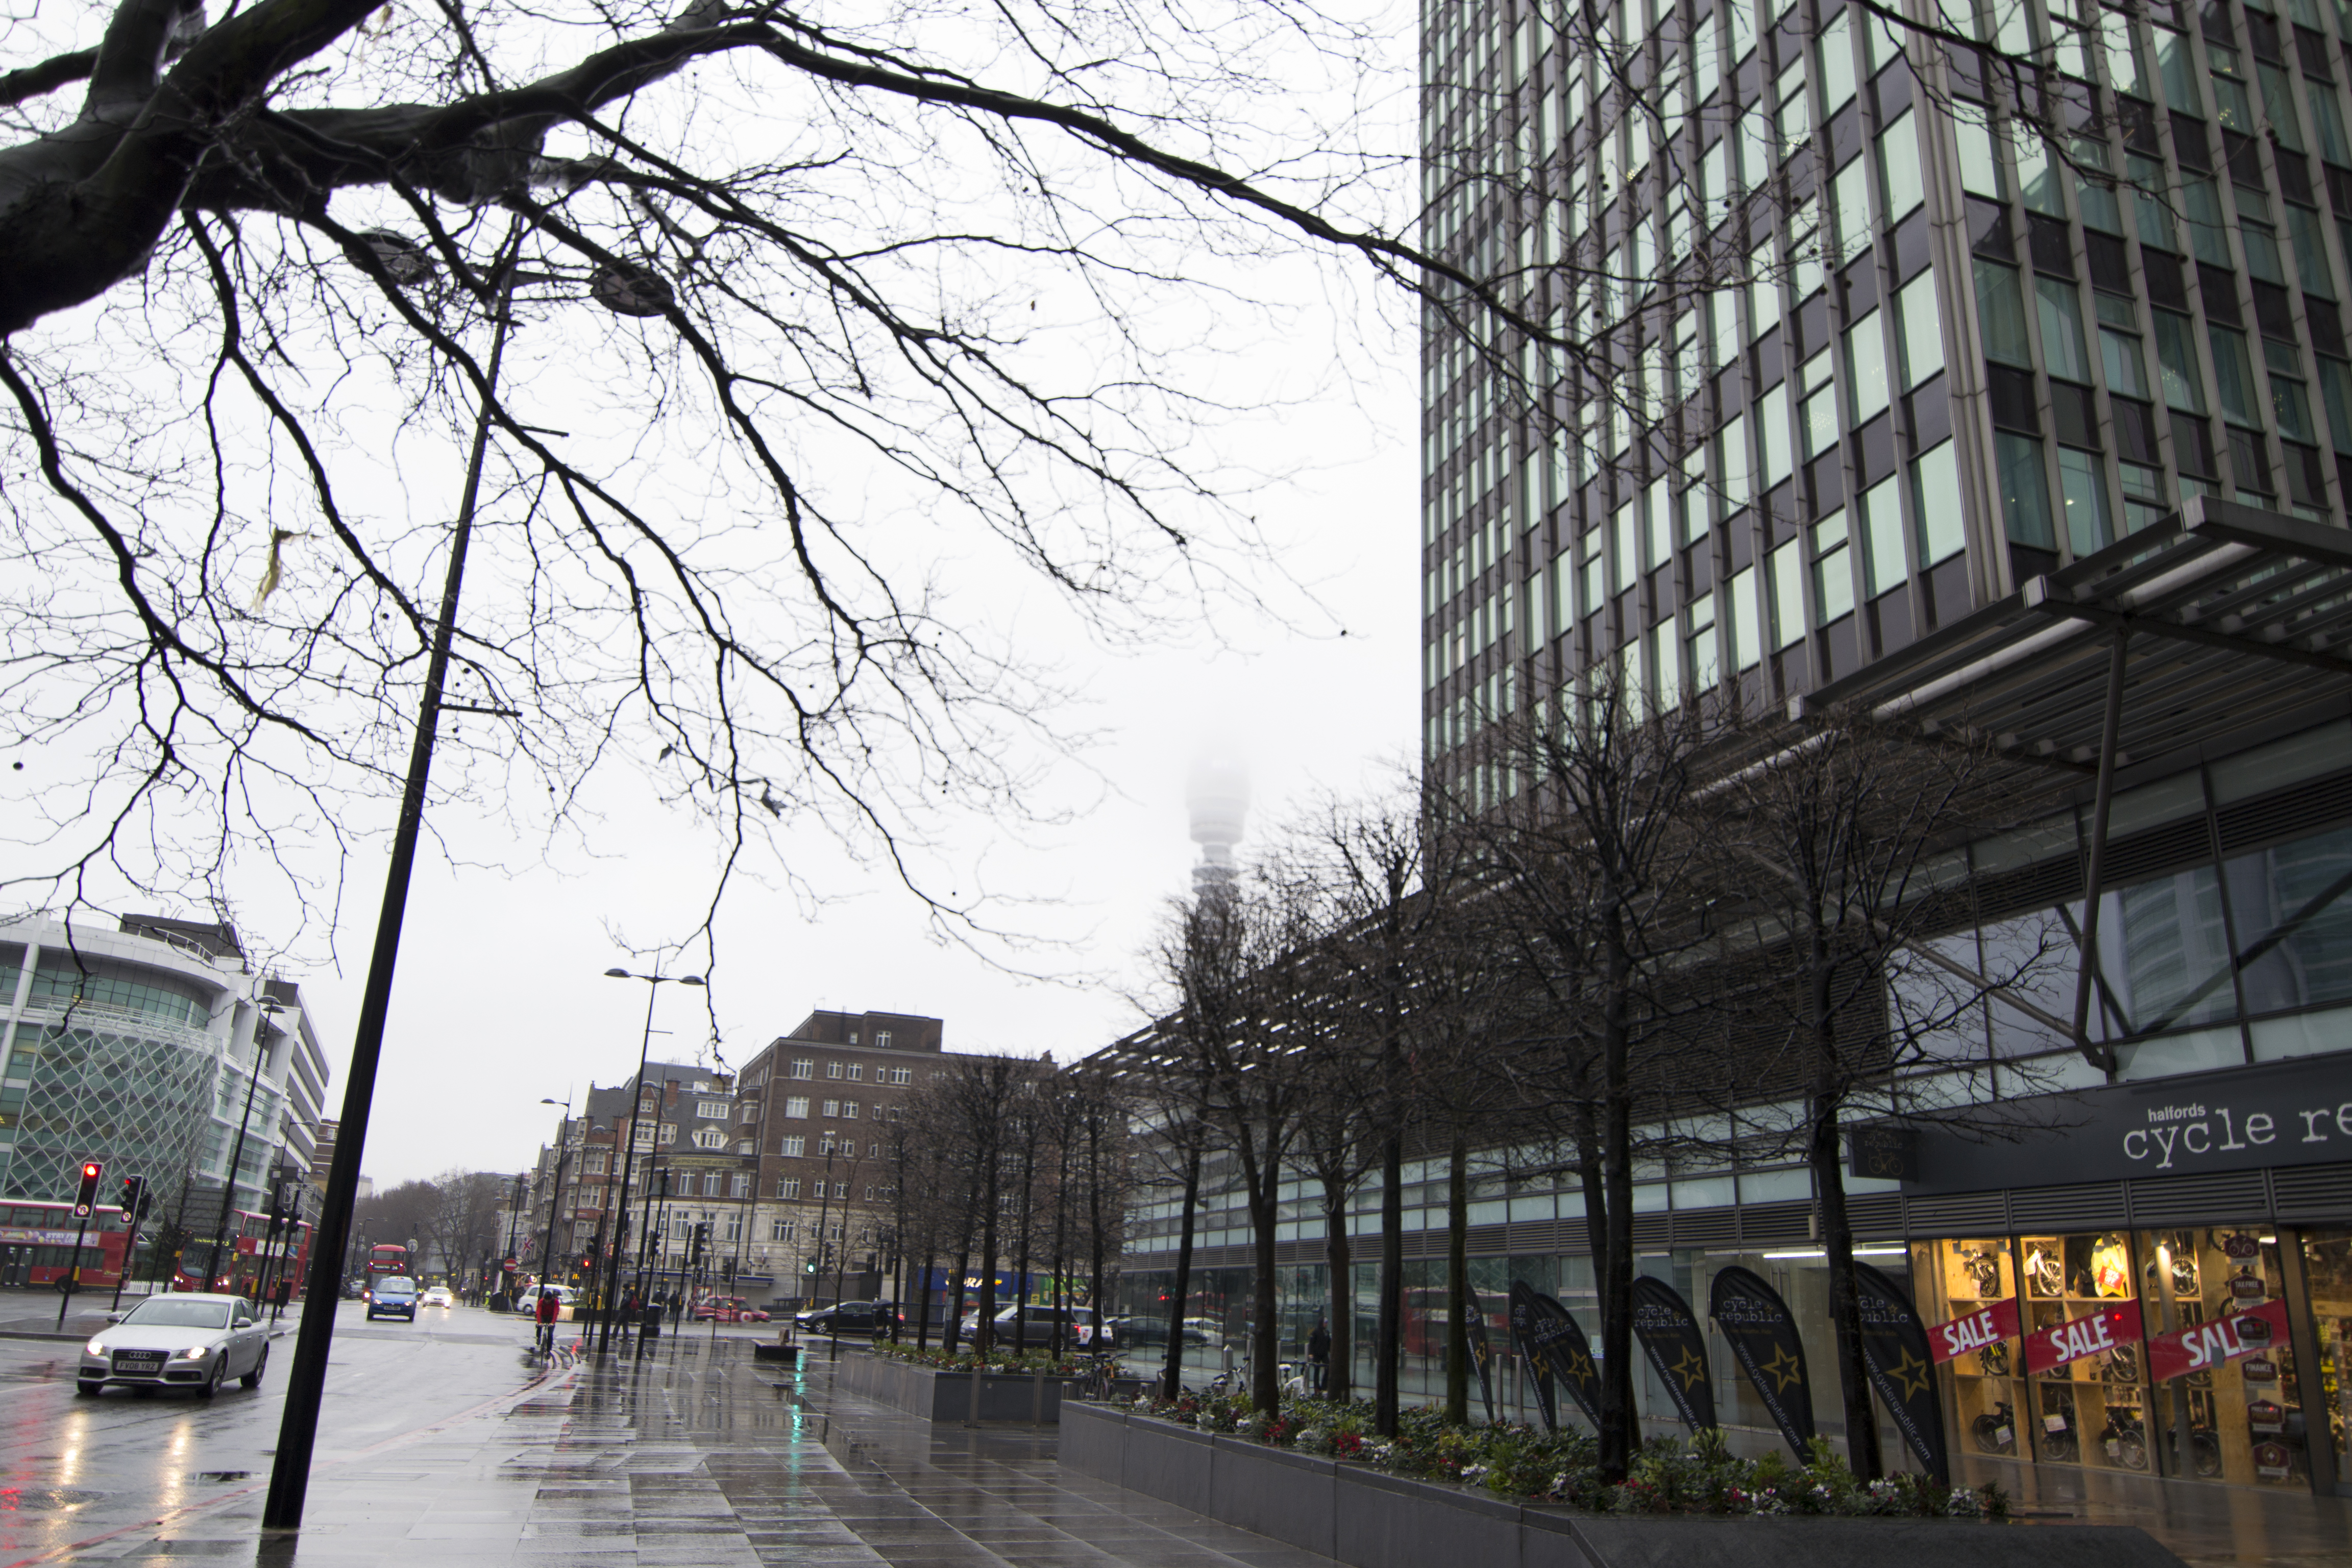
Here is the original photo by Manal Ali of A Single Shutter
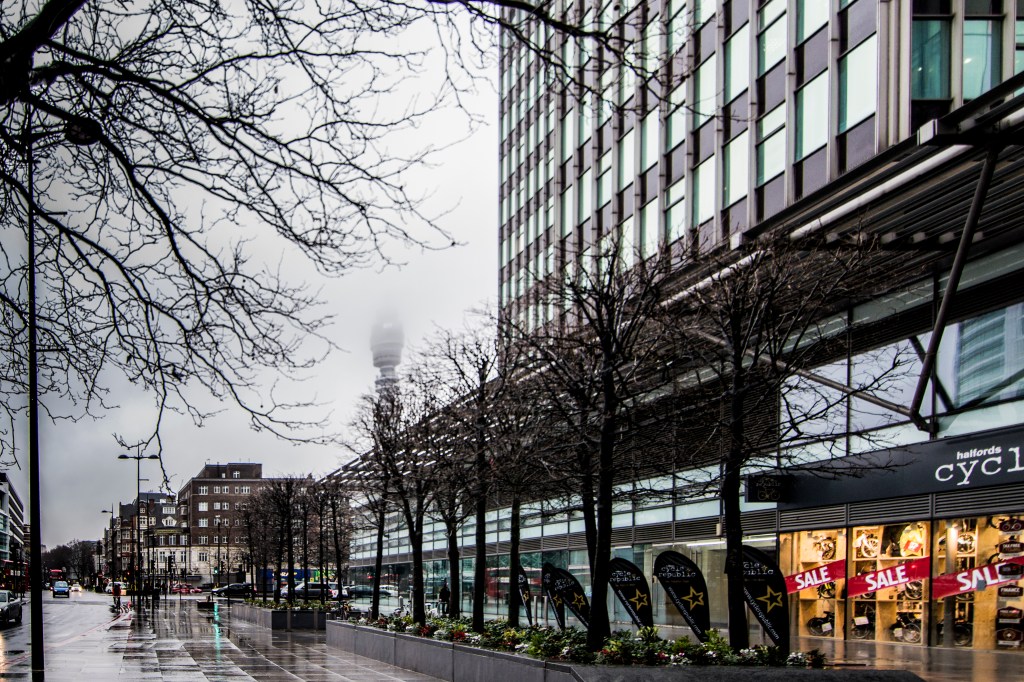
Manal Ali - original.
Manal Ali – original.

And my 2 edits:

Manal Ali - edited b&w
Manal Ali – edited b&w
Manal Ali - edited colour
Manal Ali – edited colour

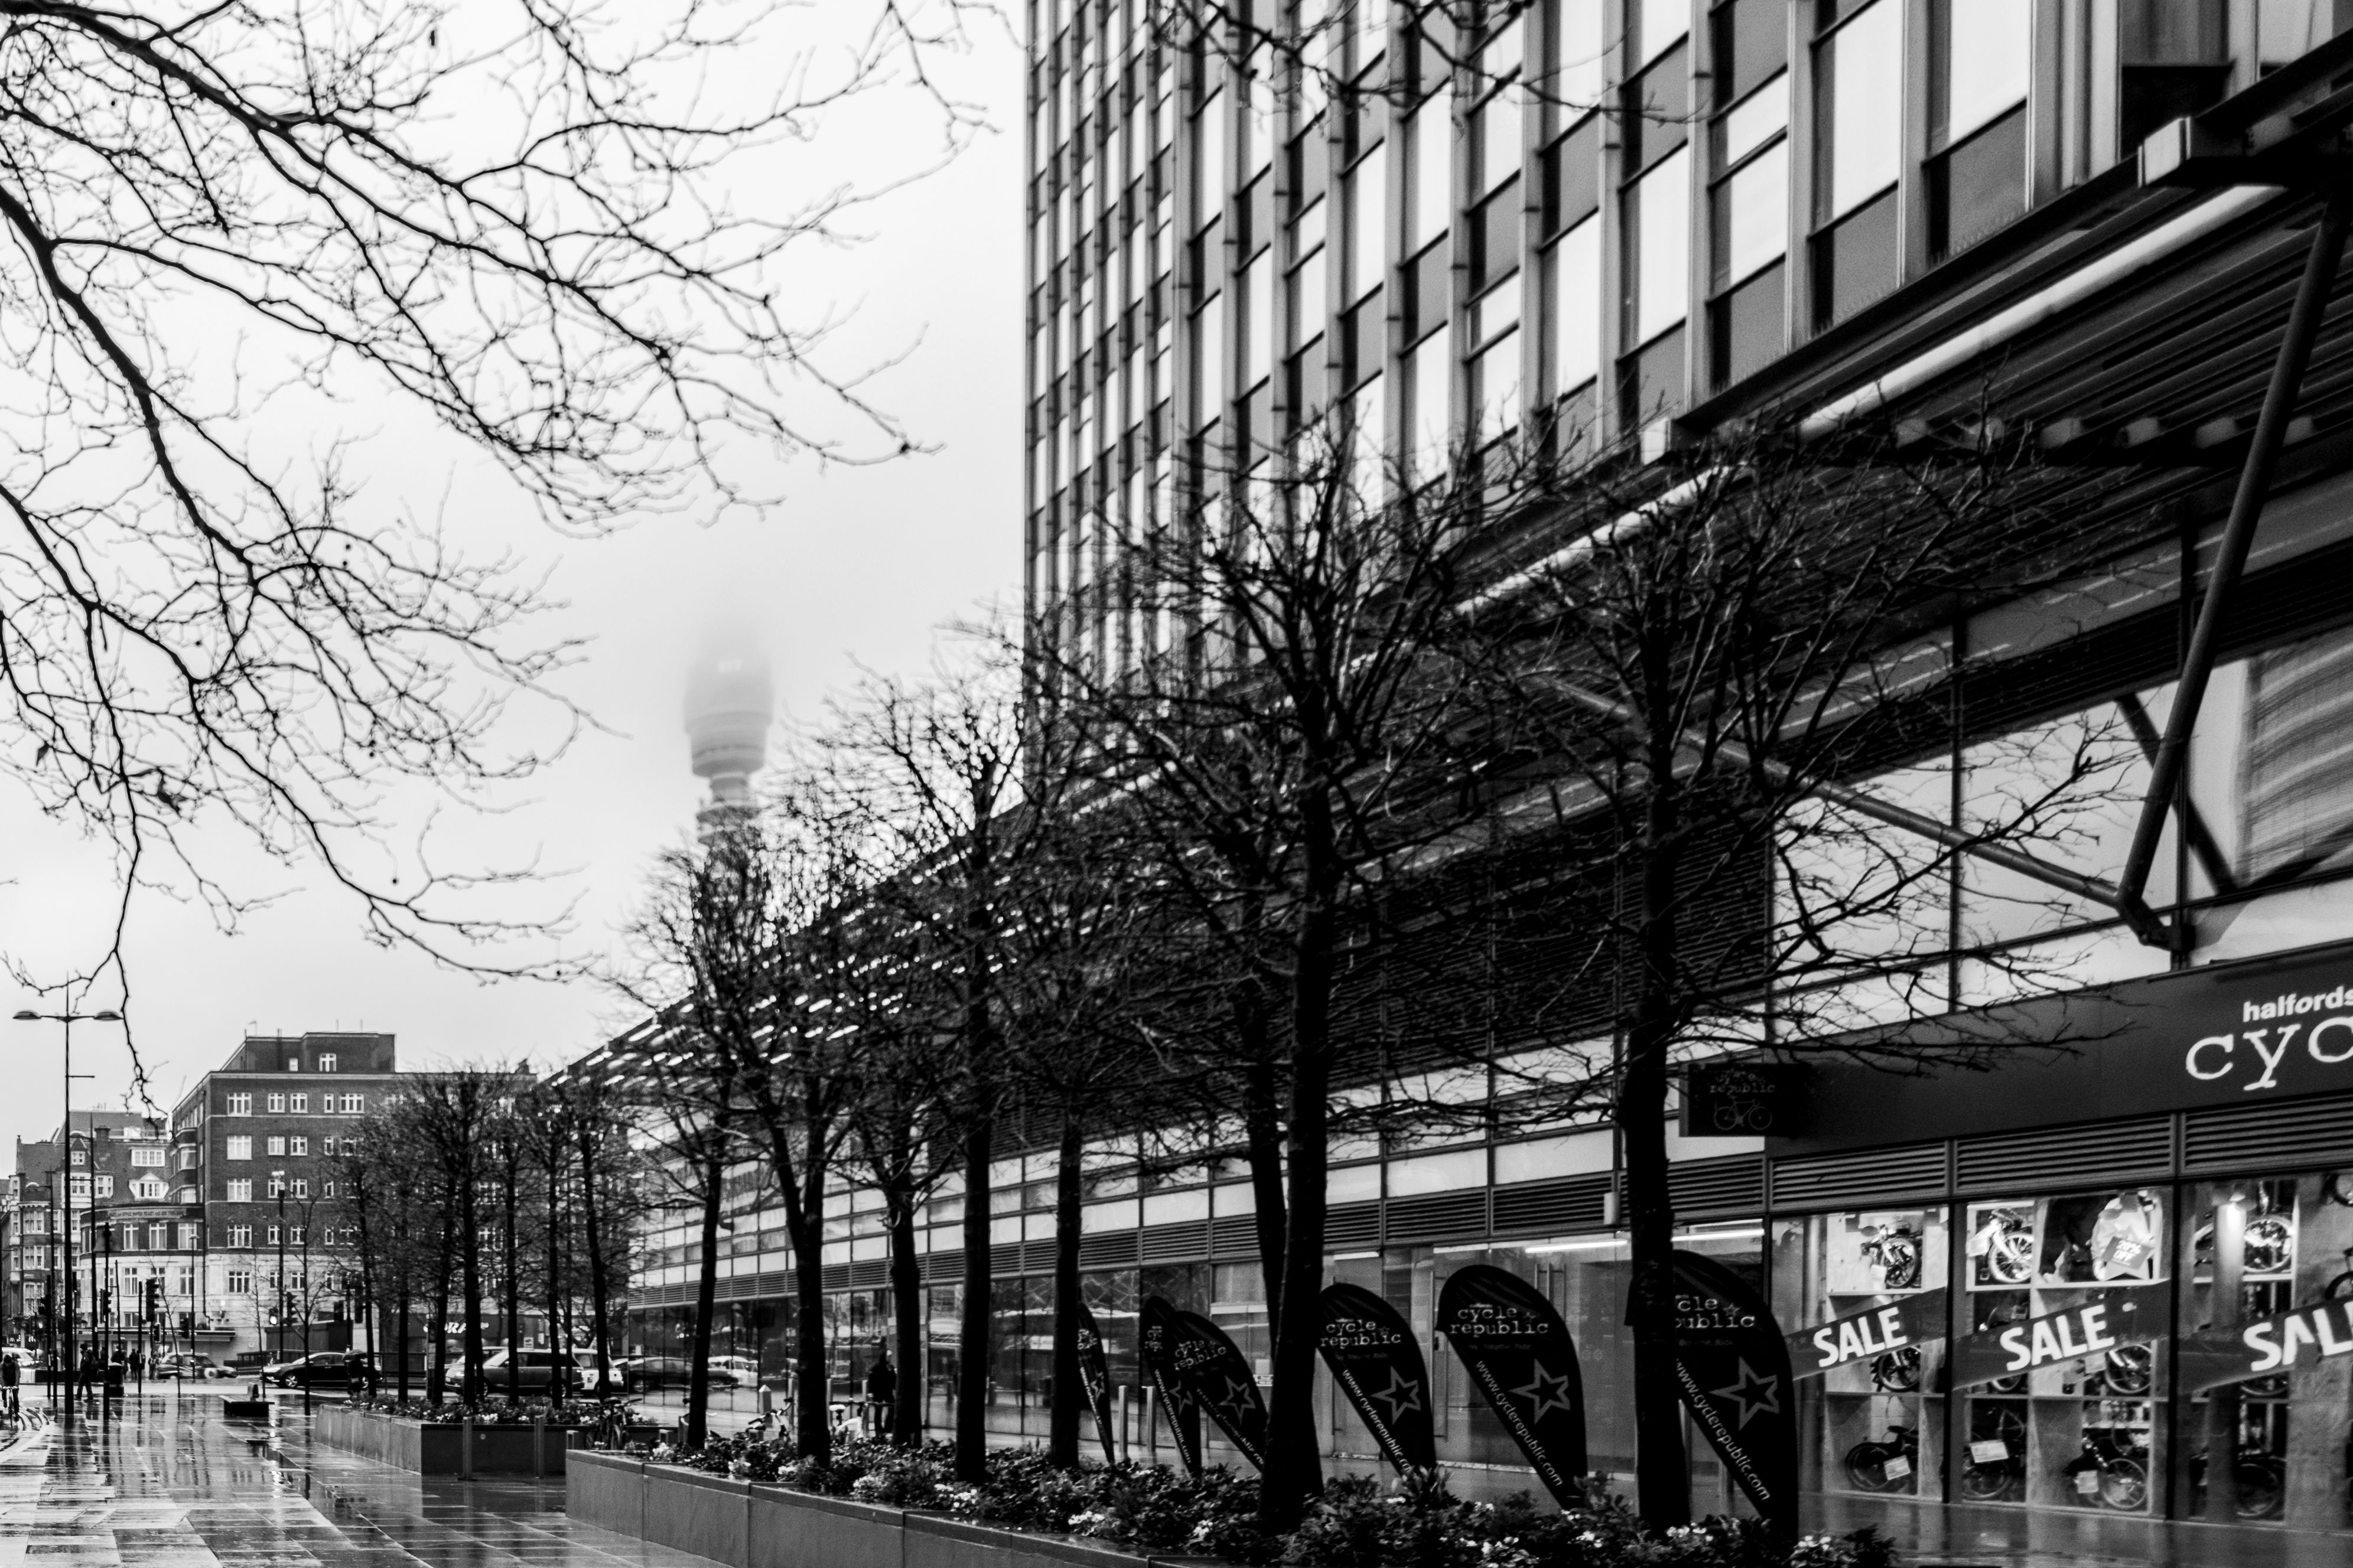
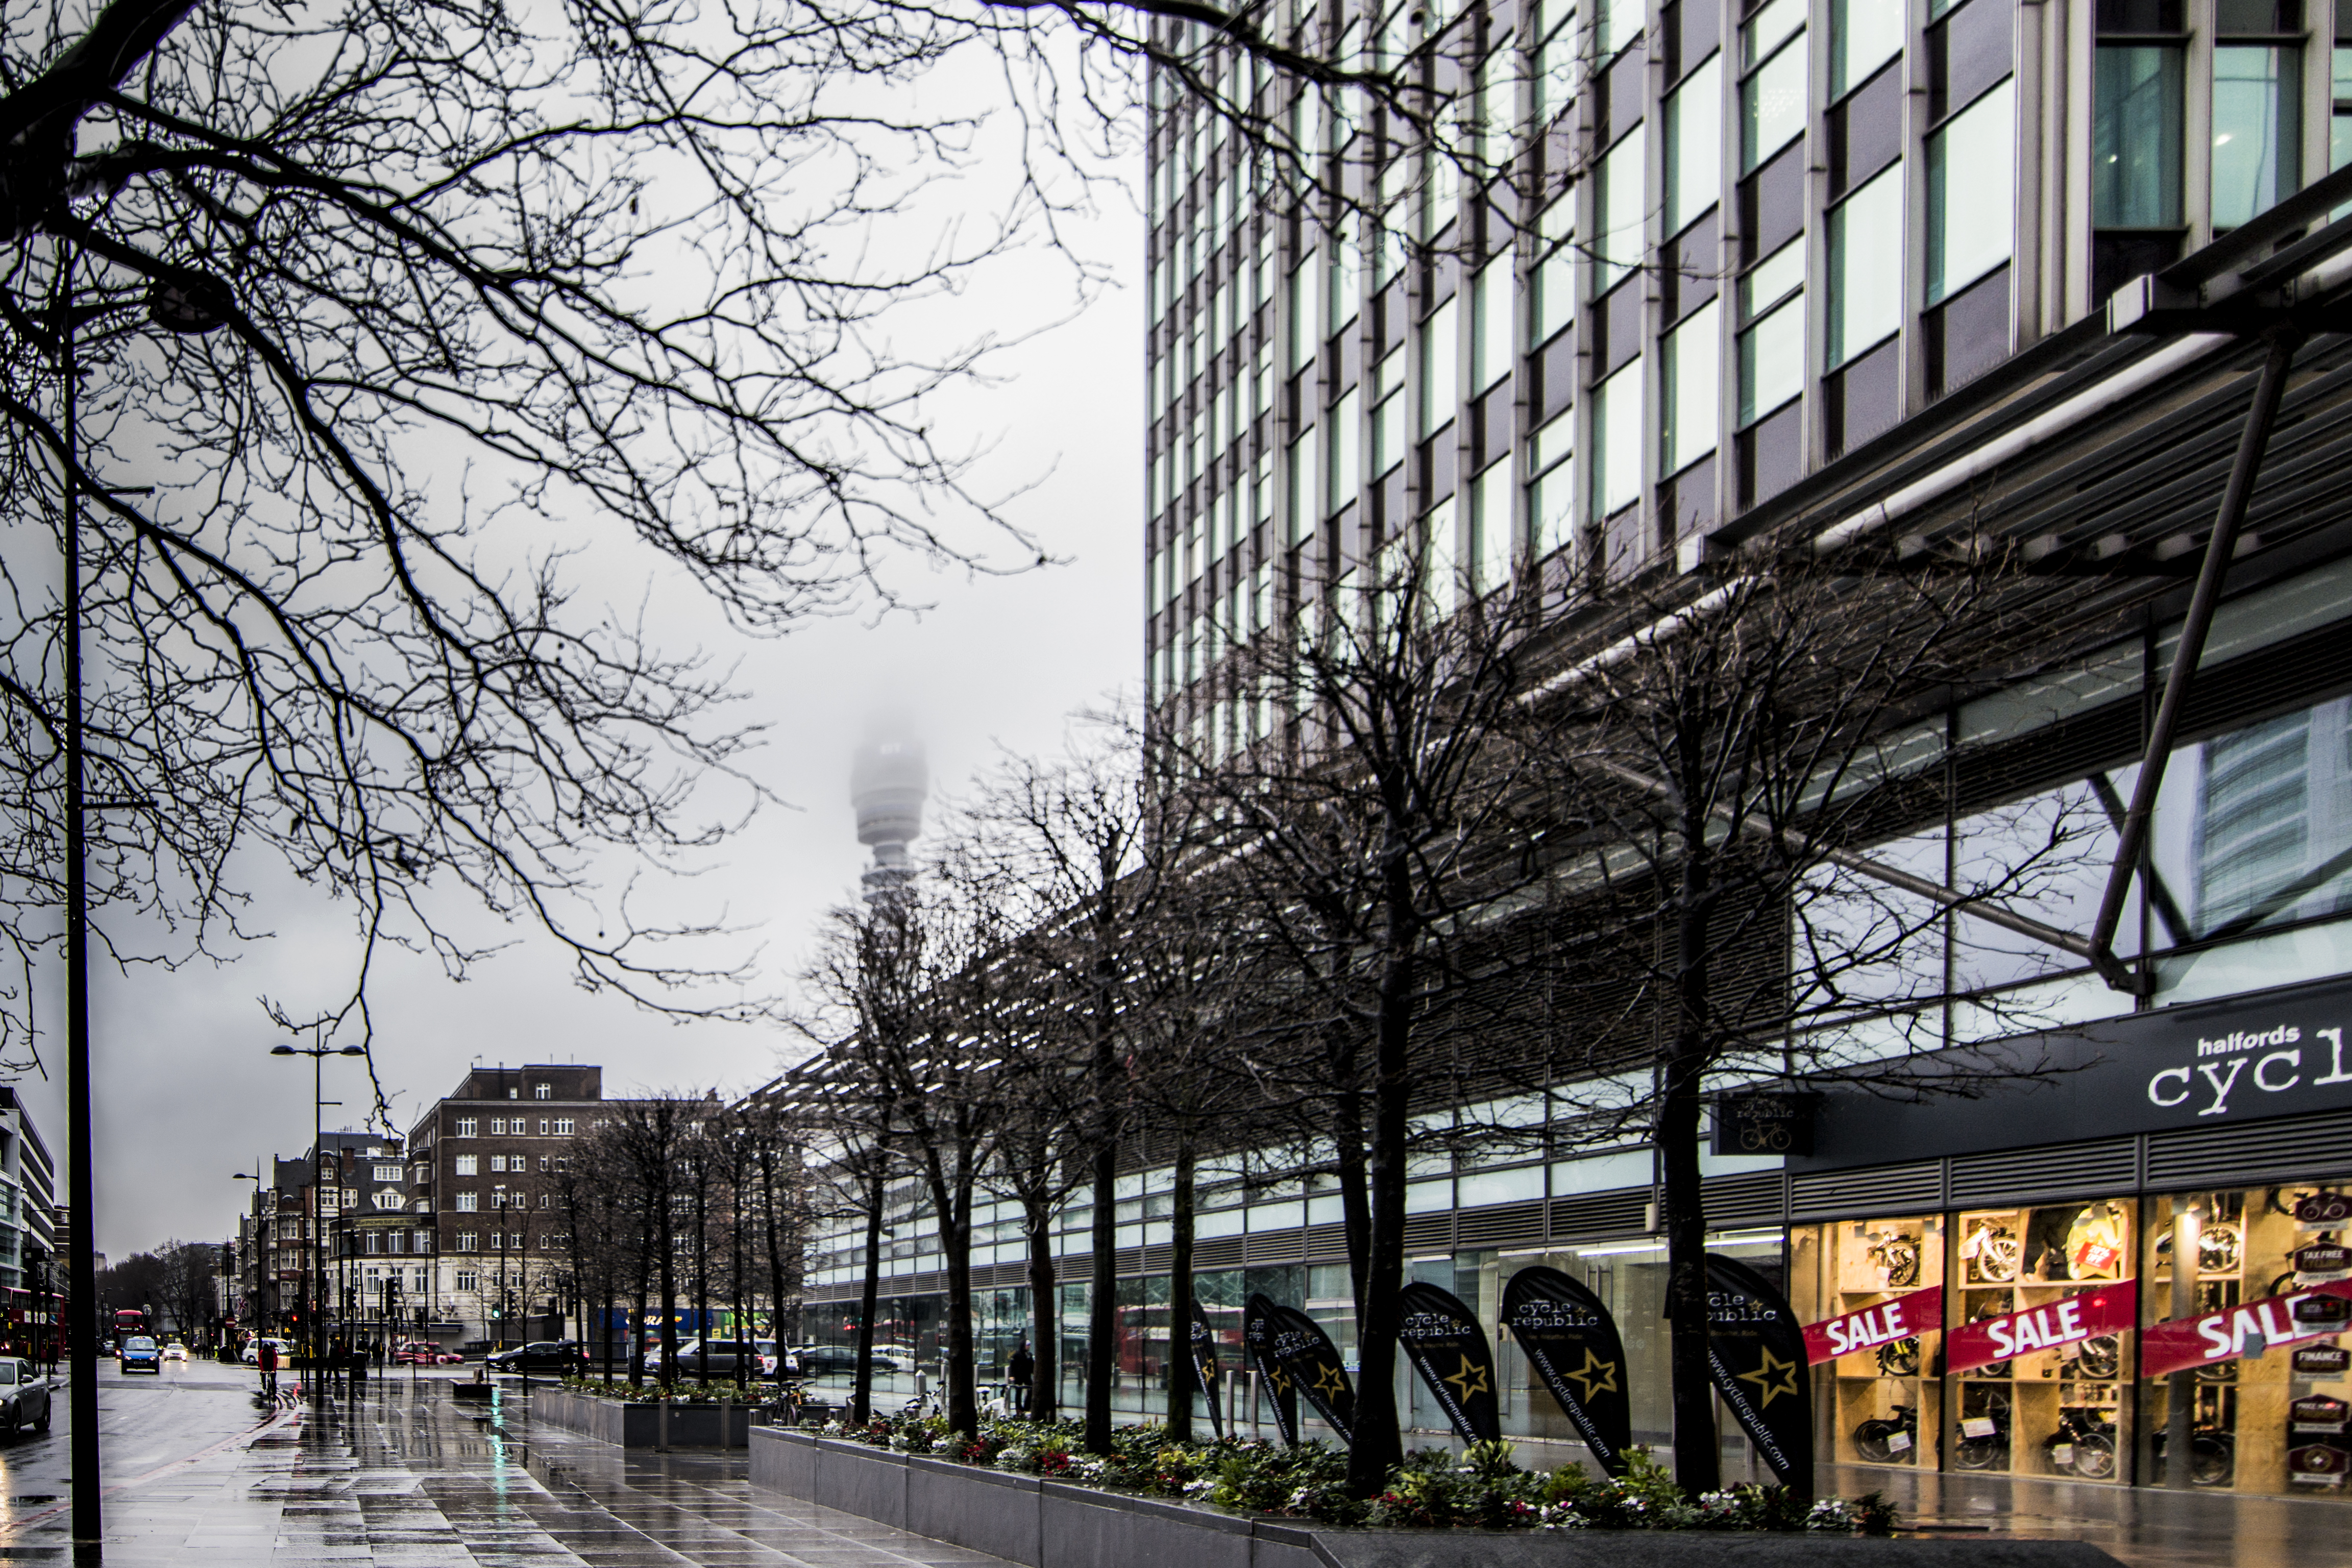
During this process, I learnt about the “Graduated Filter” tool, you can see the effect of it if you look at the two edited photos. the one on the left is “ungraduated”. The colour version, I’ve used the graduated filter on an angle front top left down in the “white space” of the sky, allowing me to decrease the exposure in just that section to bring in some moody clouds that were overexposed.

Some basic notes on the editing that I did in LightRoom –

  • corrected the for the lens so that the light poles and buildings are standing up straight – this is a good one to know about, so that your building don’t look like they are falling forward or back, usually most noticeable when using a wide angle lens. I use a 17mm lens a lot, so I just have to fix it.
  • increased exposure slightly to bring out a little more details in the buildings
  • increased contrast and clarity and decreased highlights to bring out the detail of the tree on the right

Next time, I will be better at recording what I do, to give you a little more information here.

x desleyjane


Posted by:desleyjane

photographer, blogger, planner, scientist, dog lover, frequent flyer, daughter, sister, BFF, human

48 replies on “One Photo Focus 2

      1. Most welcome. I just read the info on the link. Great challenge. Loved it.
        Made me think that perhaps we should put a bit more of a challenge at the Rehab. Need to ask permission to you guys, the board members!
        But I thought you also decided to follow a course about post processing. Xxx

        Liked by 1 person

              1. Lol no way. I had followed a course when I bought my Nikon before digital. But digital is a different game and I need to unlearn a few things and learn new ones.
                I haven’t yet thought this one through but since a few weeks I started wondering, after a person asked me what were the instructions to participate and the theme, rules, etc.
                I thought that perhaps to accommodate different styles, as some are ok with free style, and others not, we could add an optional idea of submitting photos according to certain guidelines. But as this started in a fun and non pretentious way, I concluded that I’d better ask input to you, all the current participants, and then decide.

                Liked by 1 person

  1. Bravissima! I really can appreciate the edits you made, thanks to your detailed descriptions of what you did… I can definitely see the moody clouds (love this term!) and the straightened light pole!
    Great job!

    Liked by 1 person

  2. My favourite is the colour edit. You did a great job. You mentioned at the end that you’d try and do a better job at recording what you do. No need. Over on the left you can pull up a list of all your edits from start to finish. I’d tell you how to pull up that list, but I can’t remember what the tab is, and I can’t check because I don’t have Lightroom at the moment. My trial is over and I didn’t buy it yet.

    Liked by 1 person

    1. LoL yes I wouldn’t be surprised if that was the case 😃 I haven’t looked at the others test as I went to bed as it was being posted, so I will take a look. And I will definitely add you on IG. Thanks so much!

      Like

  3. Desley, I think you did a great editing job (two great editing jobs!). The GF is a pretty handy tool to have (in fact, I used it in mine, but like your more subtle approach). And the lens correction tool is awesome. It’s interesting that you chose to crop each photo differently. Would be curious to learn your thought process. If I haven’t cropped in camera, doing so in post can sometimes take me a number of iterations to get it where I like it. This photo was like that for me 🙂

    Thanks so much for taking part this month! Looking forward to more 😀

    Liked by 1 person

    1. Thanks so much Stacy, it was fun!
      I prefer the more cropped image. After going to all that trouble of straightening that light pole, it just seemed to be a distraction. In the b&w I love that leading line you get now when you take away the post and that sliver of buildings on the left. What do you think?

      Like

      1. It’s a good question, Desley! Except for Jaime and Michelle, everyone who didn’t crop left the post in. And I never really found myself distracted, especially where the appearance was softened. Now I’ve decided it adds to the ambience of the street scene, along with the traffic in the background, and the street is its own leading line. I guess the problem I had (and still have) about deciding how or whether to crop it is based on figuring out what the subject of the scene is. I focused on the tower; and therefore I cropped; if it’s a general street scene though, then no or less of a crop. It’s a conundrum 😉

        Like

  4. A great job! I’m not sure which version I like better but the wet street seems shinier or wetter in the color version. And I like your cropping on the black and white, except now that I look back at it I realize, that is why the street seems wetter in the color- you cropped that section out in the black and white. Still, I like it!

    Liked by 1 person

  5. I really like the BW treatment here, there is something about street images like this that really lend themselves to BW and you did a great job 🙂

    Liked by 1 person

  6. I like the color one better, but both turned out great. I like your description of how you used the graduated filter. It’s a nice little tool to have!

    I can’t figure out how you straightened everything out though. I had to do it in Photoshop as I can’t get it to work right in Lightroom. Any hints??

    Nancy

    Liked by 1 person

    1. Thank you Nancy, I appreciate hearing that ☺️
      Yes! In Lightroom, in the Develop tab, scroll down past all the colour sliders until you get to camera corrections. You may have to turn that menu on if you can’t see it (by right-clicking). I just click the three boxes and hit auto and it works every time. I think you have to shoot in RAW though to have this option…. I will check for you next time I edit if you like?

      Liked by 1 person

      1. Thanks! I know exactly what you’re talking about. I didn’t think to use that – I do it manually and not as part of my presets since it doesn’t always work right. I didn’t even think of it! Big old duh on that one.

        Liked by 1 person

  7. Nice edit Desley, I didn’t even think of the graduated filter tool “doh”!! It would have tackled that cloud a lot better than an adjustment brush so I stayed away from it. I really like your style 🙂

    Liked by 1 person

I'd love to hear from you!

Fill in your details below or click an icon to log in:

WordPress.com Logo

You are commenting using your WordPress.com account. Log Out /  Change )

Twitter picture

You are commenting using your Twitter account. Log Out /  Change )

Facebook photo

You are commenting using your Facebook account. Log Out /  Change )

Connecting to %s