Welcome again to Image Reboot, a joint feature between Lucile (bridging lacunas) and myself (musings of a frequent flying scientist). Lucile asked me if I would write a monthly feature outlining what I’ve learnt about editing my photographs which I was honoured to do. I use LightRoom 5, I need to upgrade to version 6 soon. I’ve taught myself as I go, just working out what looks good through trial and error. There’s a lot more for me to learn and I’m looking forward to doing that one day when I have time.
Lucile presented a brilliant reboot last month, where she rescued an image that was overexposed, here is a little preview, but pop by and read about what she did.


Now, on to this month’s image. In the first two Image Reboot posts (ImageReboot#1 and ImageReboot#2), I did some quite extreme edits, pushing the boundaries of exposure, contrast and black and white levels. This month, I wanted to do something a little more mainstream, something that I hope you will find useful.
Here’s my original image, straight from the camera: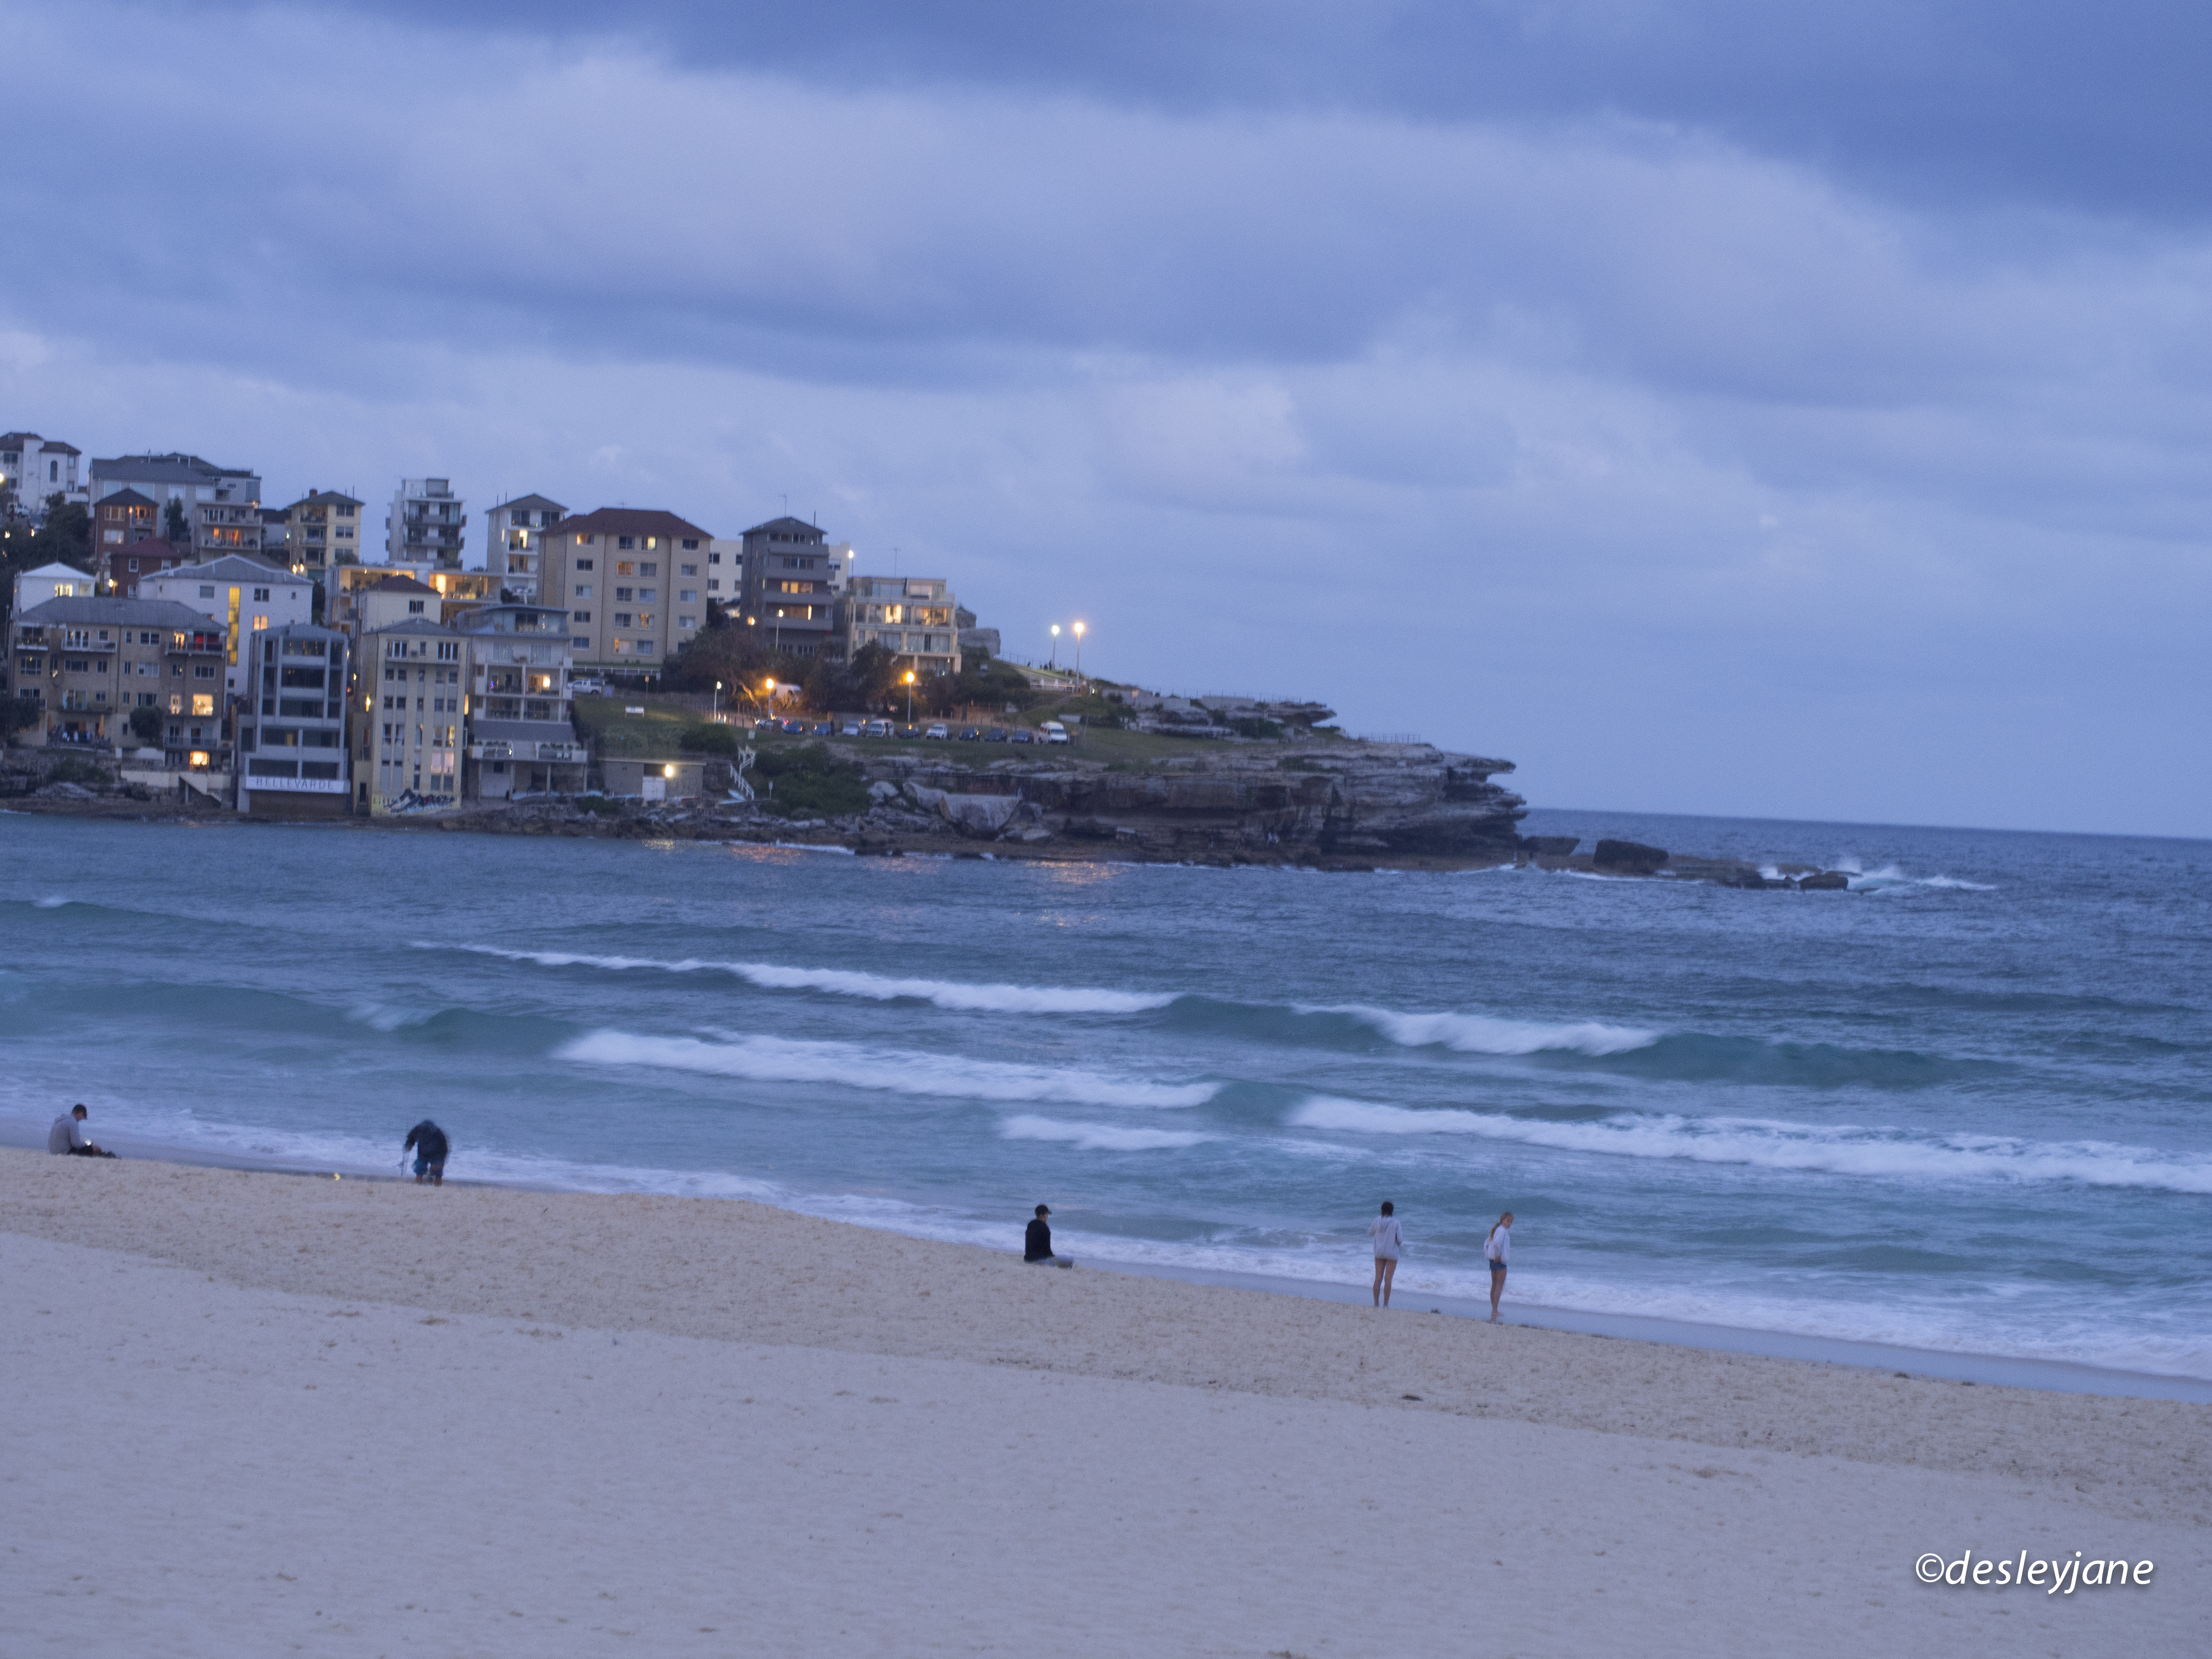 It was taken in the evening at Bondi Beach in Sydney, it was quite dark and while I used manual settings for aperture (f/4.0), shutter speed (1/5s) and ISO (800), I let the camera decide the White Balance (which I usually do).
I find the image to be quite muted. Obviously my levelling was bad – I think I was composing for the land, but completely ignored the horizon. So I knew I would have to correct the horizon by straightening the image.
So here’s the process I went through:
- import into LightRoom with my preset (noise reduction and lens correction)
- I then straightened the horizon and cropped slightly because the guy sitting down on the left was cut in half by the lens correction
- next, i increased exposure just slightly (+0.2) to brighten the image a little, make it less muted
- I then increased the contrast (+26) and highlights (+26) to sharpen up the colours
- I decreased shadows (-26) which means that the shadows become a little darker – I find that this helps with creating a more contrasted image
- To complete the level contrast, I increased the white level (+25) and decreased the black level (-27) then boosted clarity (+24)
- Finally, something we haven’t talked about before is adjusting the white balance. The camera white balance was set to auto and this usually works pretty well, but since it was quite dark, it seems to have taken the colours more towards blue and I think that’s what has contributed to the overall “muted-ness” of the image. So, I increased the temperature (+5) and increased the tint (7.4k). These numbers don’t tell us much, but in the white balance adjustment area, the sliders are coloured. Temperature is coloured blue through to orange – which equates to cool through to warm.
- I wanted to reduce the amount of blue, so I warmed up the image by moving it towards orange. You get immediate feedback on the image itself, so you can easily see where to stop.
- The tint slider is coloured green through pink. Once I’d removed some of the blue in the step above, I noticed that the image was still a little green, so a very small adjustment towards the pink end of the slider gave me the result I wanted.
Here is my final image: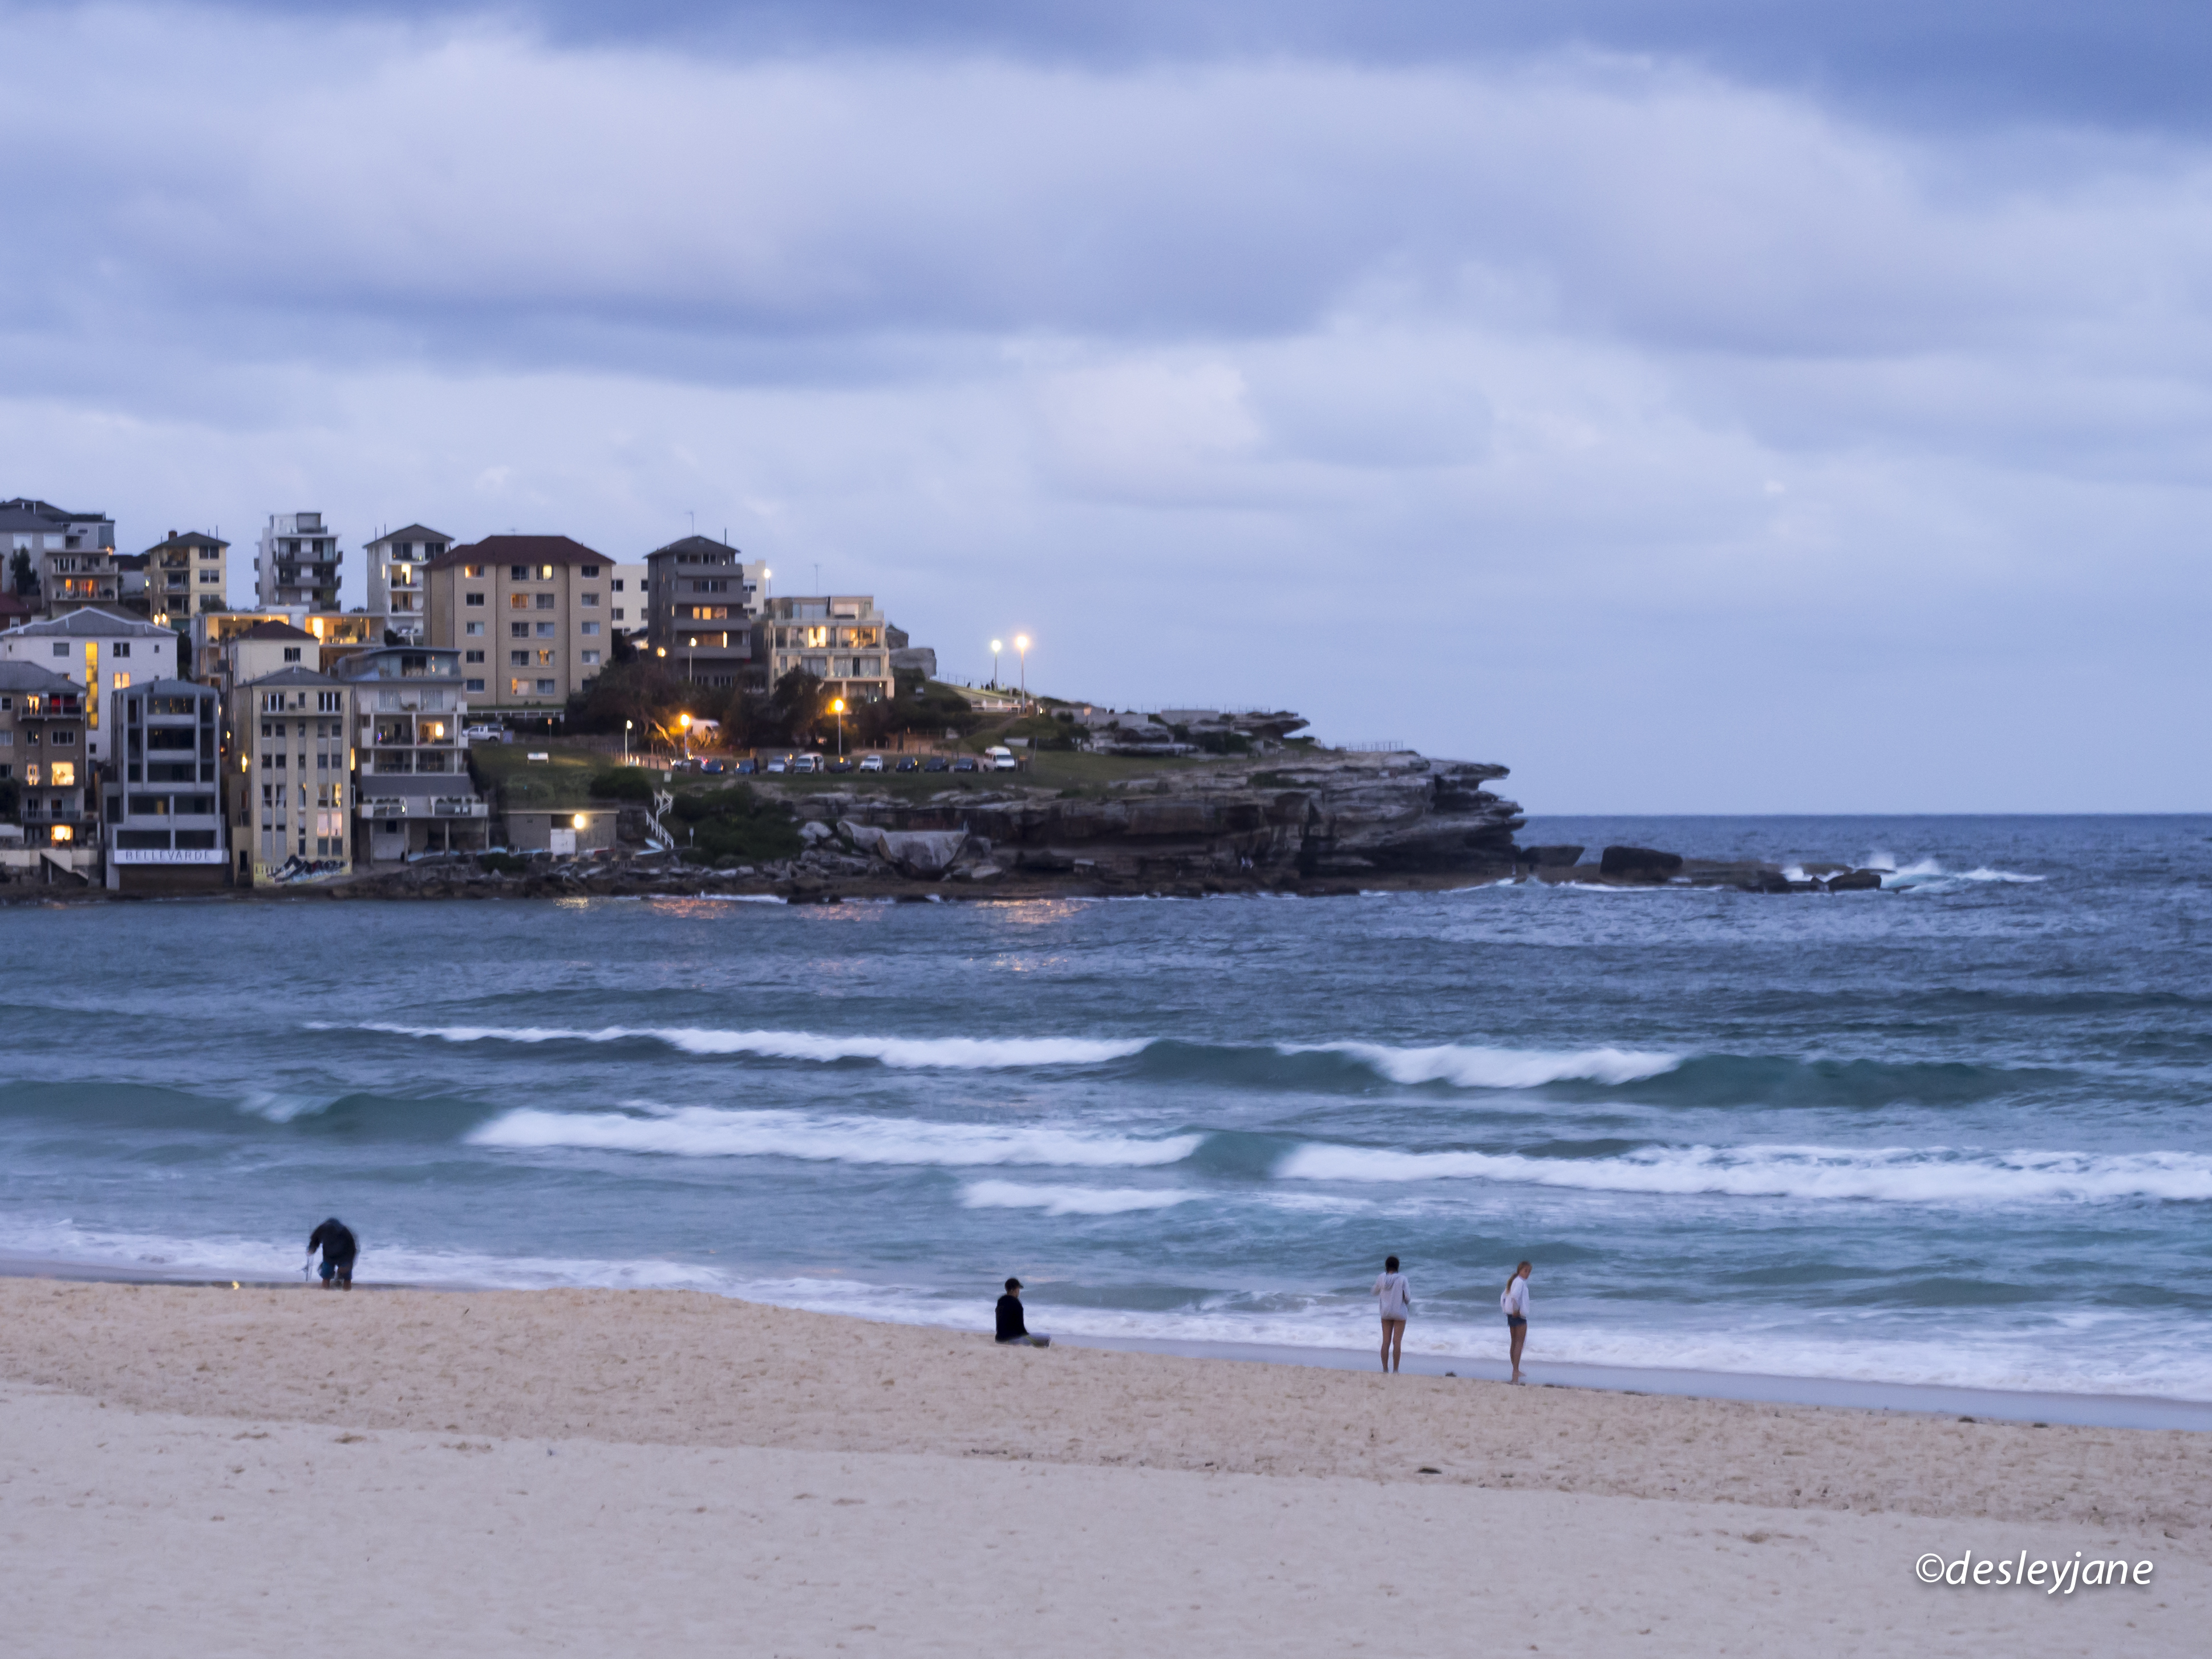 Finally, I thought I would show you how I would then convert to black and white. It’s not necessarily as straightforward as clicking the “black and white” button. It can be, but I find that black and white images do well with a little more boosting to contrast and clarity. Here’s what I did:
- convert to black and white
- decreased the contrast (-22) – this actually brings out more detail in the buildings
- I pushed the clarity all the way up (+100) to provide more crispness to the details in those buildings
- I pulled down the black levels (-75), white levels (-27), shadows (-46) and upped the highlights (+54) which all served to give the image some contrast – separating the black and white parts
- The image ended up a little dark at this point, so I increased exposure (+0.8)
- I felt like this image would look good in a panoramic crop so I cropped to 16:9 – this let me put the seated guy back in the image on the far left 😉
Here it is! What do you think?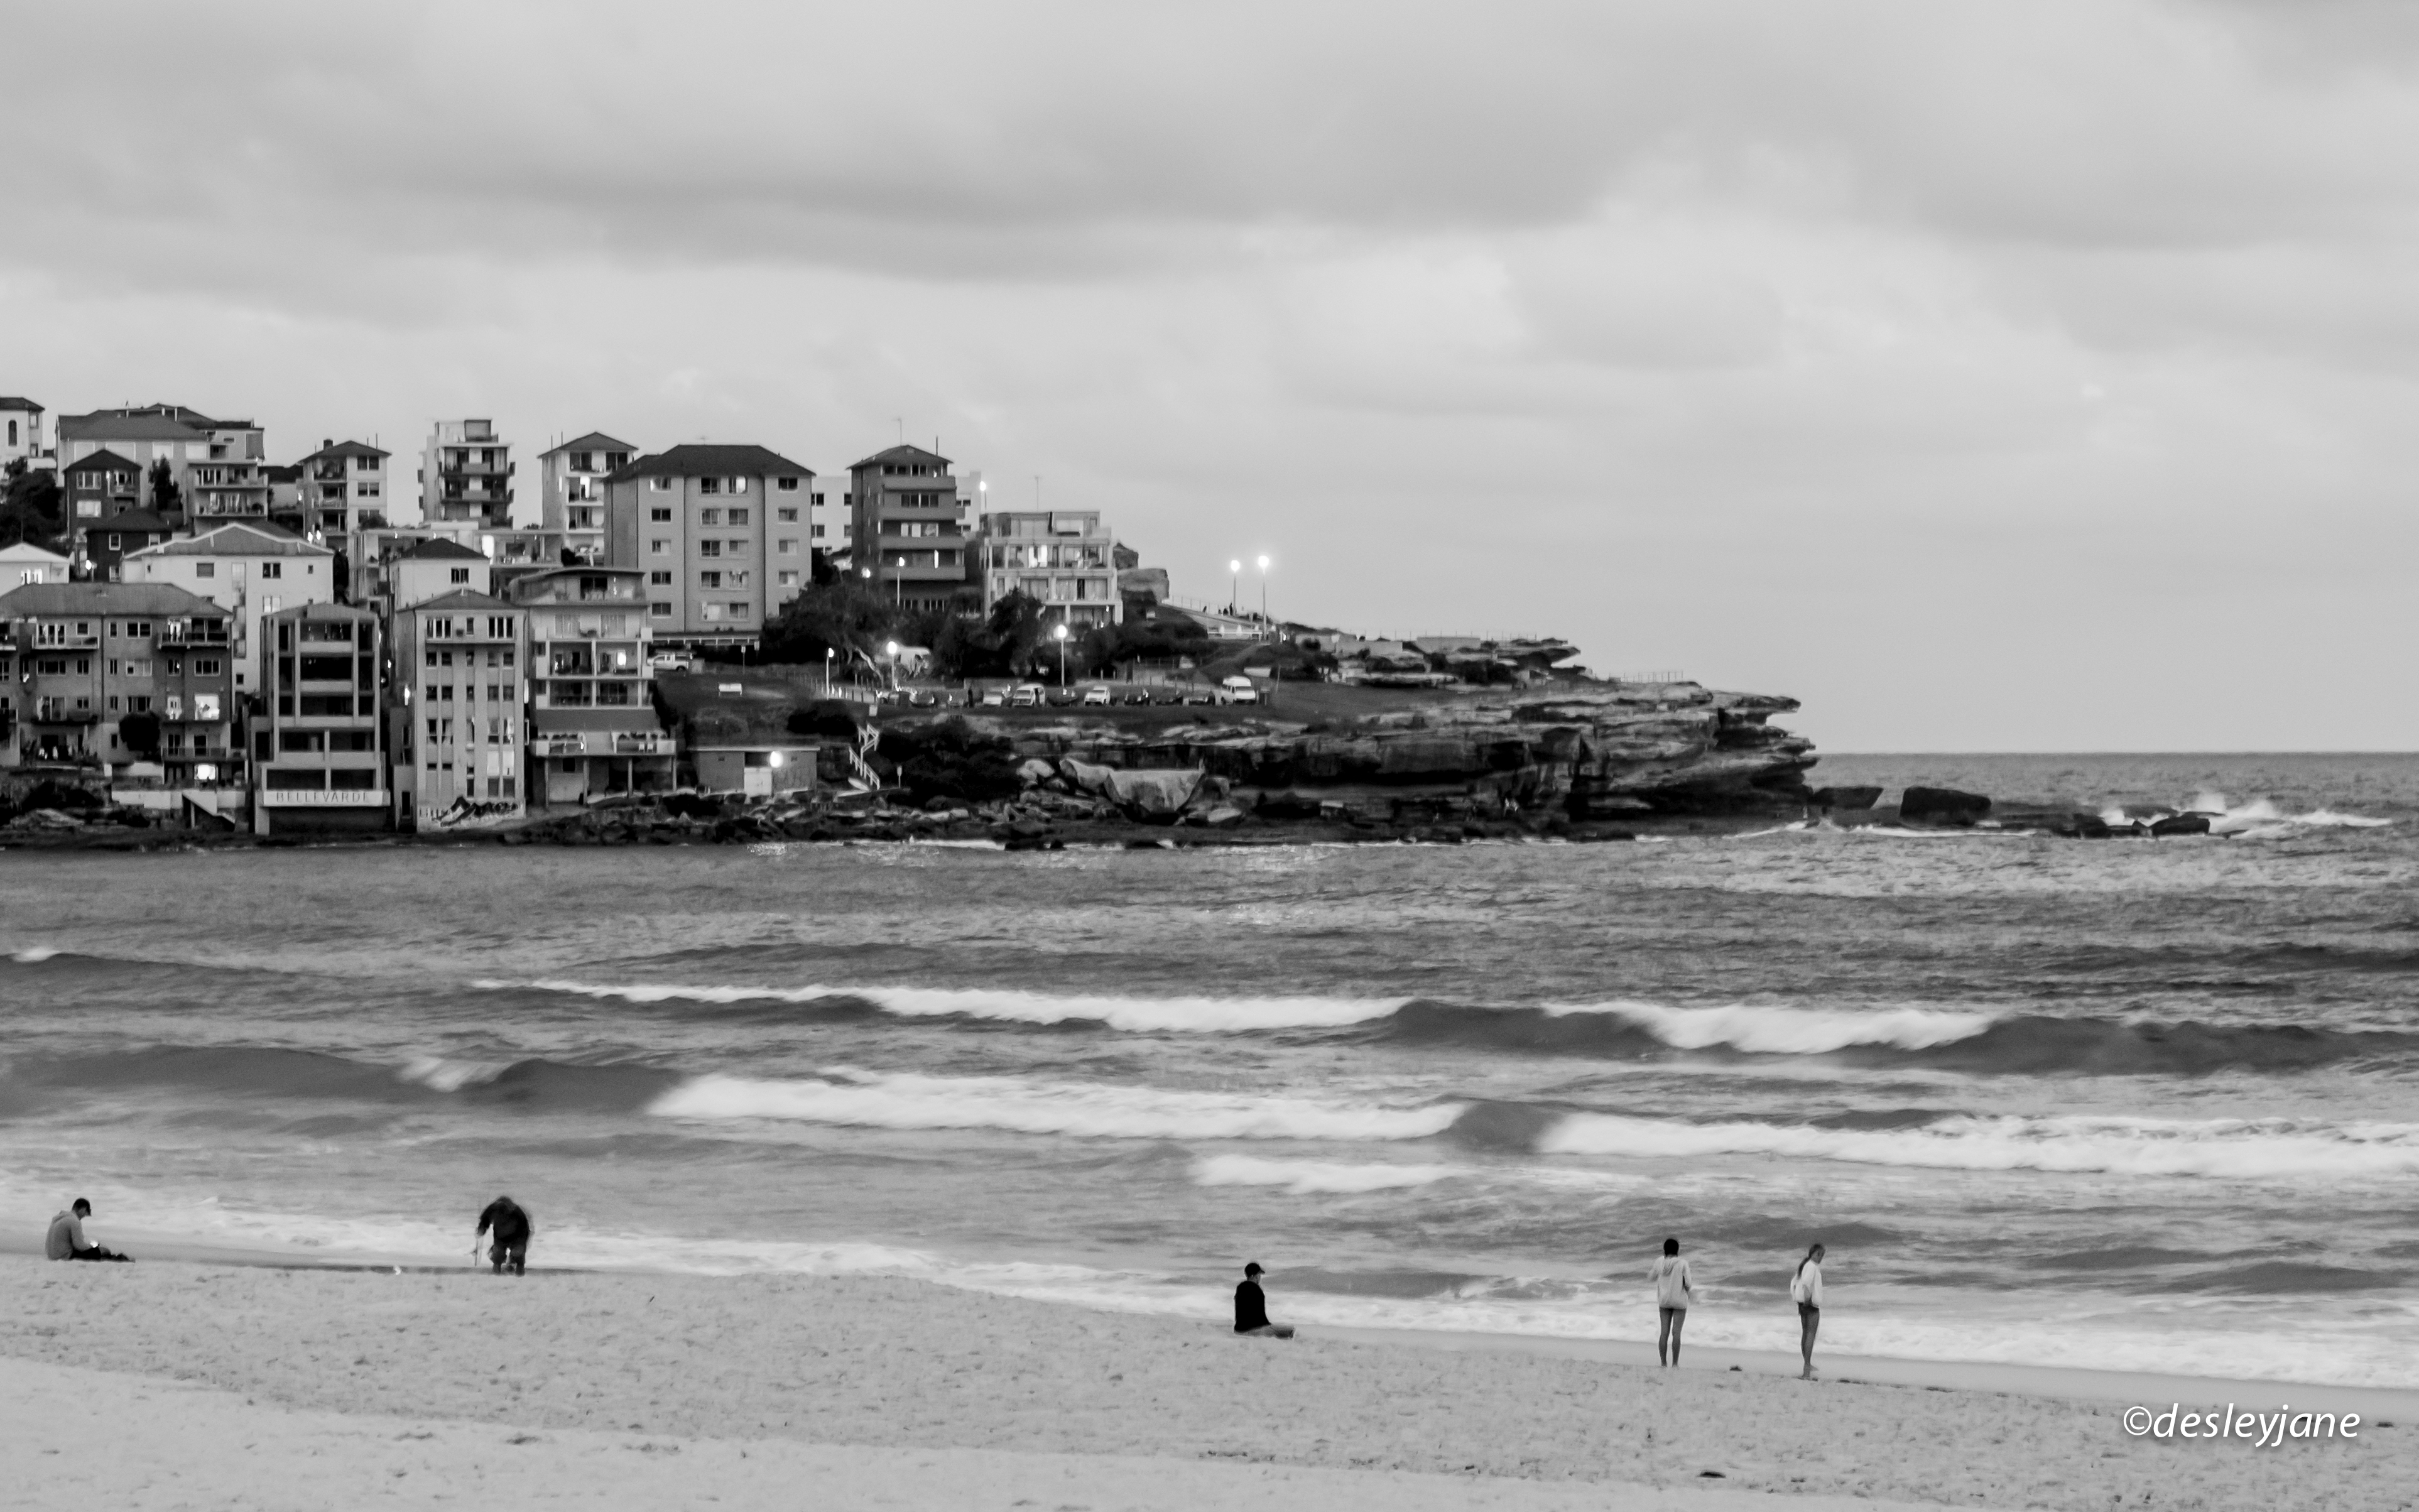 There’s something about black and white beach scenes. I love them in colour, and usually they look amazing in colour, but the serenity of a black and white beach scene really makes me happy.
Anyway, that’s it for this month. We’d love to hear back from you. If you’d like to have a go at this yourself, that would be great. I can share the image with you, or you can use your own image. If you do, please tag your post with imagereboot and link back to this post.
x desleyjane

I’d love to hear from you!